Gardening has been shown to reduce stress, anxiety, and your grocery bill. But not everyone has the time, space, or patience to sprout, grow, and harvest a full garden. Luckily there are tons of way to incorporate gardening into your space, time, and budget constraints. Increase your veggie intake and enjoy a fun new hobby; start a microgreen garden!
What is a Microgreen?
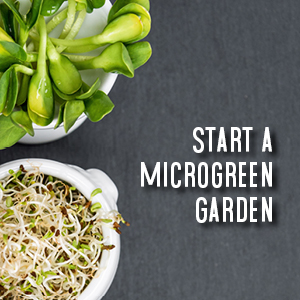
Microgrees are the shoots of lettuces and salad greens that have just developed leaves. So basically there are between sprouts and baby lettuces.
They are simple and fairly low maintenance veggies that provide a convenient way to up your intake of greens. Not only are they easy and convenient, studies have suggested that microgreens more concentrations nutrients than mature vegetables and herbs. They are also rich in antioxidants that promote health and prevent diseases.
Pick Your Seeds
The type of greens you go for when you decide to start a microgreen garden is totally up to you! However, you may want to take into consideration your experience level. If you don’t have much experience with gardening outside of a few potted plants and watching grandma harvest her carrots, you might want to go for some of the easier microgreens.
Easiest Microgreens to Grow
- Chinese Mustard
- Cabbage
- Wheatgrass
- Bok Choy
- Arugula
Some garden centers even carry pre-mixed microgreen blends. But if you’re a little more seasoned and confident, you can jump into some of the more tricky microgreens.
Advanced Microgreens
- Amaranth
- Basil
- Beets
Tools and Materials
- Tray or container
- Seeds
- Spray Bottle
- Paper Towel or cloth
- Plant Labels
- Soil (prefferably organic seed starting soil)
Here We Grow!
Steps to start your microgreen garden:
- Check and see if you need to pre-soak your seeds. Some larger seeds do recommend pre-soaking. If so, follow the pre-soaking directions on the packaging. If not required, move on to step 2.
- Line your tray with a damp papertowel or a thin cloth. This will prevent your soil from falling through the drainage holes and making a mess.
- Fill your tray about 3/4 of the way full with moist soil. (at least 1 inch)
- Sprinkle your chosen seeds over the soil and press lightly.
- Spread a thin layer of soil on top of the seeds and press lightly.
- Water with a spray bottle to prevent the dislodging of seeds.
- Place near a window that gets good light.
- Water with spray bottle as needed. The soil should never dry out, but avoid over watering. You shouldn’t need to spray more than 2 or 3 times a day at most.
- Cover tray with a punnet lid to create a humid environment for your new little garden.
It’s as simple as that to start a microgreen garden. You microgreens should be ready to harvest within 1-3 weeks when they are about 3 inches tall (depending on the seed). To harvest simply use some sharp, clean scissors to cut the stems right above the soil and you’re ready to go!
Snazz up your salads, smoothies, sandwiches, and eggs while adding a much needed serving of greens to your day!
Need ideas on how to use your new microgreens? Check out our article on meal prepping for ideas!
